Google Search Console (GSC) is a powerful tool the search giant provides to help view and monitor your website's performance. Setting up Search Console is critical to your website's success on the internet and can be used to improve your website's SEO.
Using Google Search Console for your website is crucial because the data you see inside its reports is directly from Google. You can use these reports to identify places your website needs to improve, direct SEO efforts, and double down on areas you're already doing well.
In this guide, I'll walk you through step by step on how to add Google Search Console to your website and discover site performance opportunities that will increase your chances of ranking and attracting more traffic.
Think of Google Search Console as a way for you and Google to communicate.
Google Search Console vs Google Analytics
Google Search Console and Google Analytics are commonly confused because they are both Google-owned marketing tools for data-savvy website owners. Despite their similarities, however, they aren’t the same.
Google Search Console helps you monitor your website’s performance generally and in search engine results. Google Analytics enables you to learn more about your users, including who they are, how they found you, and how they interact with your website. Google Analytics' reach expands beyond your website and into ads and social media.
What is Google Search Console?
Originally called Google Webmaster tools, Google search console helps site owners understand how their websites perform in Google search. GSC provides several reports to:
- monitor site's performance and queries you're ranking for in search results
- submit sitemaps and investigate or request indexation
- optimize for user experience and mobile usability
- implement structured data like breadcrumbs and FAQs
- alert you if Google detects a problem with your website
What is Google Analytics?
Google Analytics, on the other hand, is a web analytics platform that tracks and reports website traffic. It allows users to see how visitors interact with their website, including the number of visitors, where they come from, and how they navigate around the site. Google Analytics also provides insights into how effective your advertising campaigns are and how to improve website performance. Some reports you can find on Google Analytics will help you
- track user and traffic acquisition by different sources
- see how they interact with your app or website
- record purchases and conversion events like downloading a lead magnet
- understand vital information like demographics and device usage that you can use in your ads
Google search console and Google analytics are free online tools that Google provides to website owners. They may seem the same at first glance but are two entirely different platforms with unique capabilities.
How to set up Google Search Console
1. Log into GSC with your Google account
Head to Google Search Console and sign in to your Google search console account.
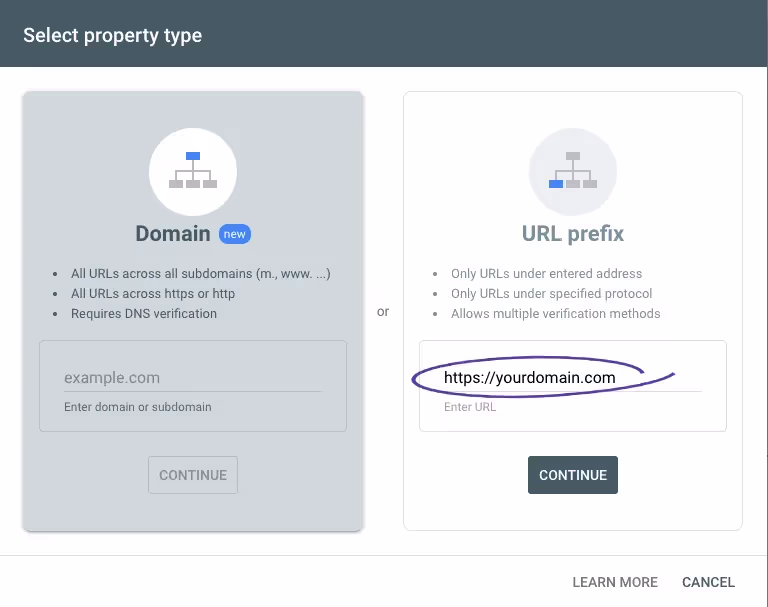
On the next screen, GSC will offer you two options - to set up Search Console for your entire domain or only a specific URL path.
2. Enter your domain or URL path
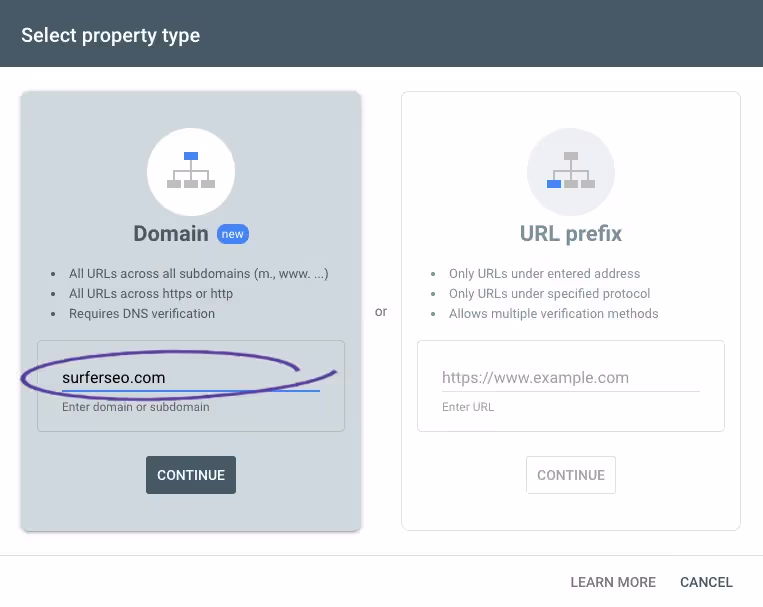
These are the two options for setting up Search Console on your website.
Setting up Google Search Console for your entire domain
This is the best option if you want to set up Search Console to track the performance of all the pages on your website, including mobile and HTTPS versions and subdomains like blog.yourdomain.com. If you'd instead set up Google Search Console for a specific URL, head to the next section.
To proceed with a Google Search Console setup for your entire website, select the left panel and enter your domain or subdomain only without the HTTPS. For example, I've entered surferseo.com
Setting up Google Search Console for a specific URL path
Select the right panel to capture GSC data on pages on a particular URL path, like yourdomain.com/blog.
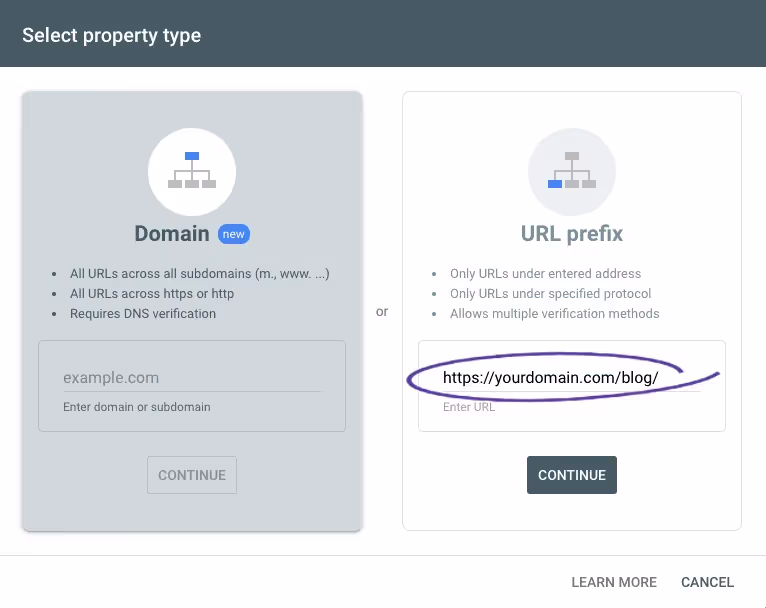
Hit Continue. GSC will take a few seconds and then ask you to verify domain ownership via several options.
3. Verify your domain
You'll need to verify ownership of the URL you entered to activate your Google Search Console account. You'll have a few options depending on which property type you entered in the previous step.
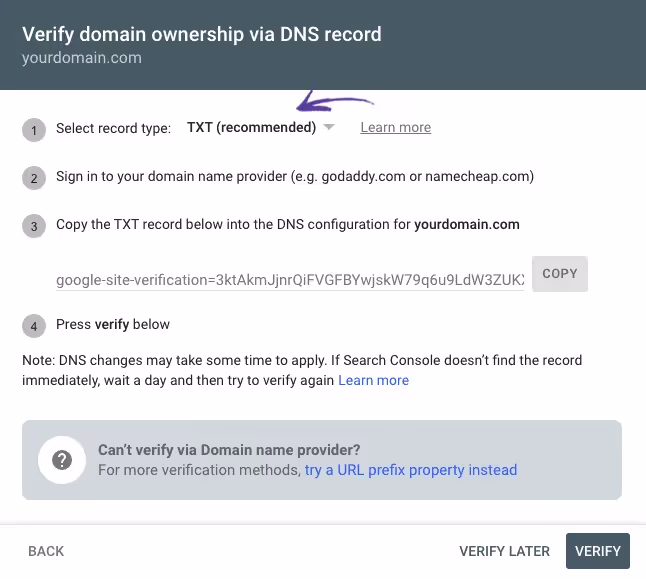
Verifying GSC for a domain-level property
If you're attaching a domain property, you can only verify it using either the TXT or CNAME record type from your DNS records provided by your domain provider.
To verify domain ownership using TXT record
Select TXT in the Select record type field and follow the instructions to sign into your domain name provider in a new window.
Navigate to your domain and find its DNS settings to configure. You should be taken to a DNS Management screen with all your DNS records.
Click to add a new DNS record. Select TXT under Type and enter "@" under host/name with TTL set to auto or 1 hour. For example, here is what creating a new TXT record in my DNS settings looks like. Be sure to add the TXT record provided by GSC in the value/content field.
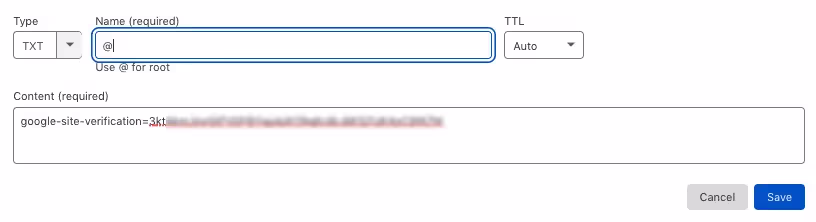
Click Verify.
Verifying GSC for a URL prefix property
Google search console setup for a URL prefix can be verified using five different verification methods from uploading an HTML file to associating DNS records in your domain name provider. Let's take a look at each one of them.
1. To verify URL prefix ownership using HTML file
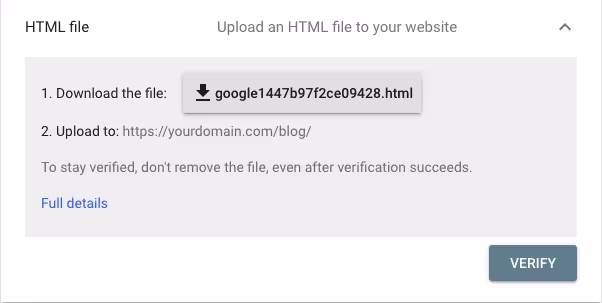
To verify your website through this method, you will need access to your server via FTP or a cPanel File Manager. If you are not familiar with either of these methods, do not attempt to use this verification process.
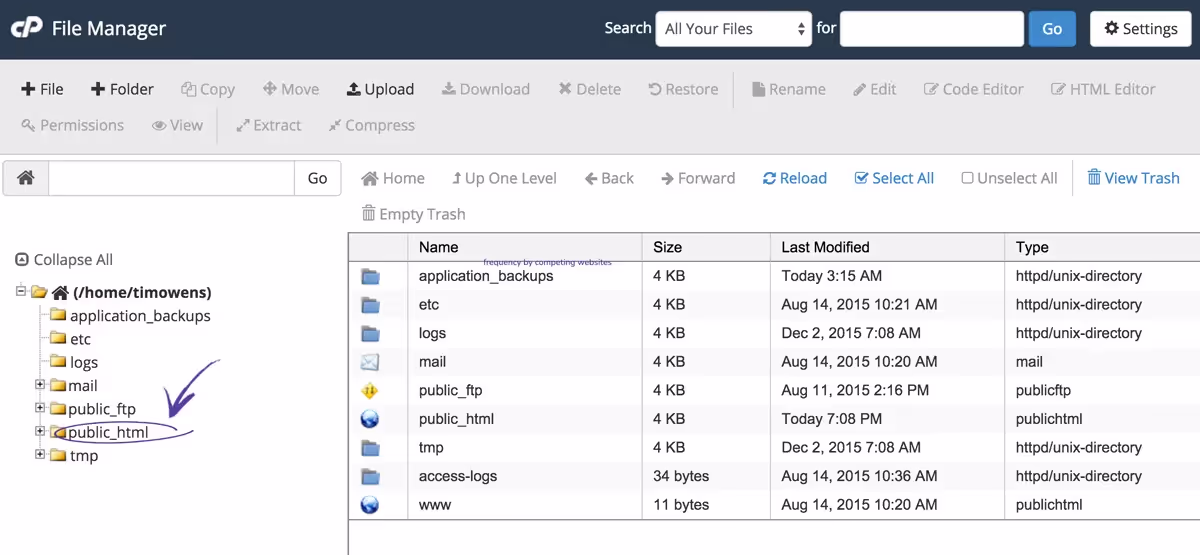
Select the HTML file option to open instructions. Download the file and then upload it to your root directory (public_html) using Cpanel or an FTP tool like Cyberduck.
Head back to GSC and click Verify.
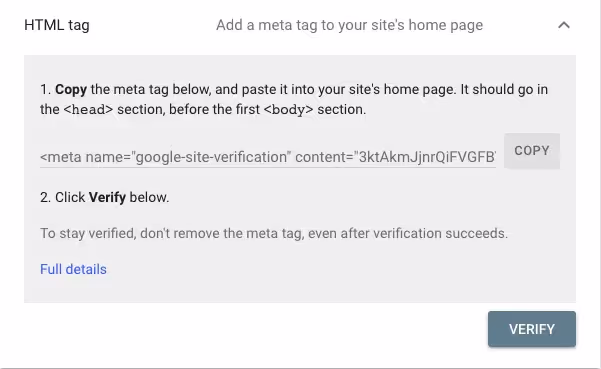
2. To verify URL prefix ownership using HTML tag
If you're on a WordPress website, the easiest way to do this is to use a WordPress plugin like Surfer that will make the verification process easier, so you don't have to edit the code. This is especially important if you don't have a child theme setup because updating or changing your theme will wipe out the HTML tag you just inserted.
Install the plugin from your WordPress dashboard and head to its settings. Paste the HTML tag generated by Google Search Console in the GSC HTML tag field.
If you prefer to manually edit your theme, you will need access to the URL page's HTML to insert the provided meta tag in the <head> section.
For example, if you're using a CMS like WordPress, log in to your WordPress dashboard and navigate to Appearance > Editor. Next, select your current theme and find header.php in the drop-down.
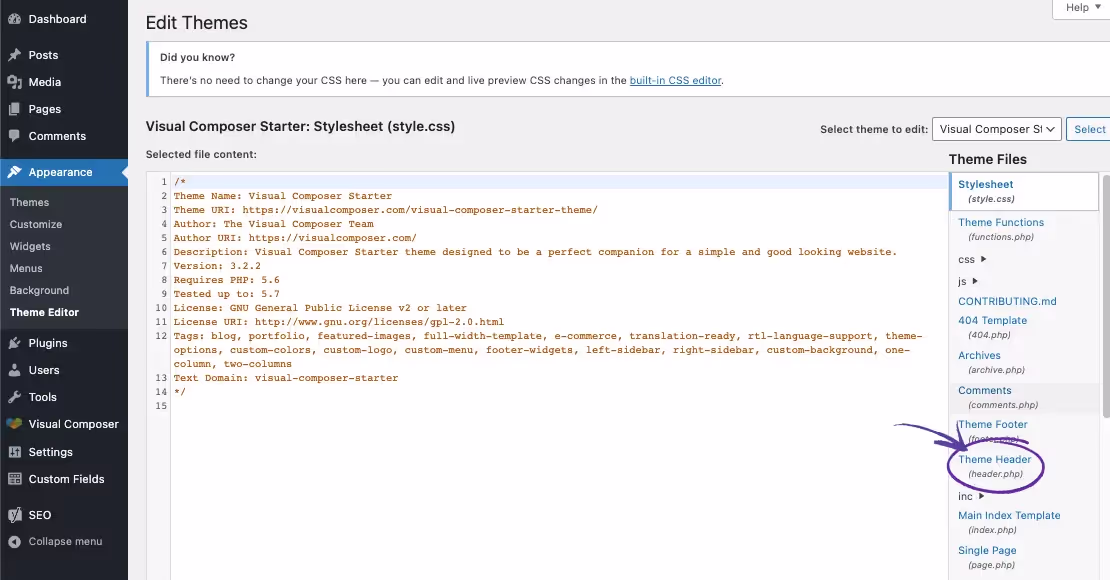
Paste the meta tag and click Update file. Then head back to GSC and click Verify.
Scroll below to see how to set up Google Search Console for WordPress.
3. To verify URL prefix ownership using Google Analytics

If you've already installed a Google Analytics tracking code on your website, you must click Verify, and you should be automatically verified. If not, then select another method or first install a Google Analytics tracking code on your domain.
4. To verify URL prefix ownership using Google Tag Manager
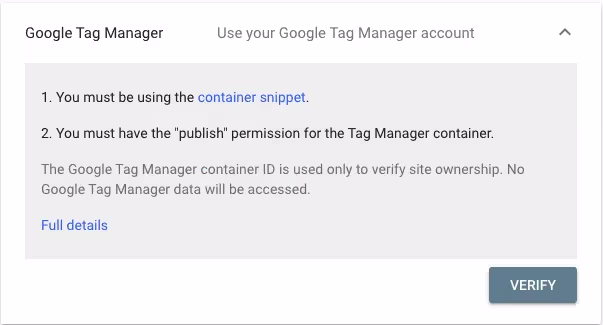
Similarly, to be automatically verified of the URL prefix property using Google Tag Manager, you can click on Verify if you've already connected your domain to GTM. You'll first have to install and set up Google Tag Manager for your new property to use this method.
5. To verify URL prefix ownership using DNS records

If this step looks familiar, it is because this is the verification method for a domain-level property that we already discussed in the first step. Follow those steps for Google to recognize you as the URL's verified owner.
In most cases, using any of these verification methods will suffice for integration with Search Console. Here are some additional techniques for installing a Google Search console setup for your website.
How to add Google Search Console to WordPress
You can use the HTML tag method we mentioned above to set up Search Console for URL prefix properties on a WordPress website.
The challenge with pasting your meta tag directly into the <head> section of the theme editor is that if you don't have a parent-child theme setup, you'll have to do it every time you update or install a new theme.
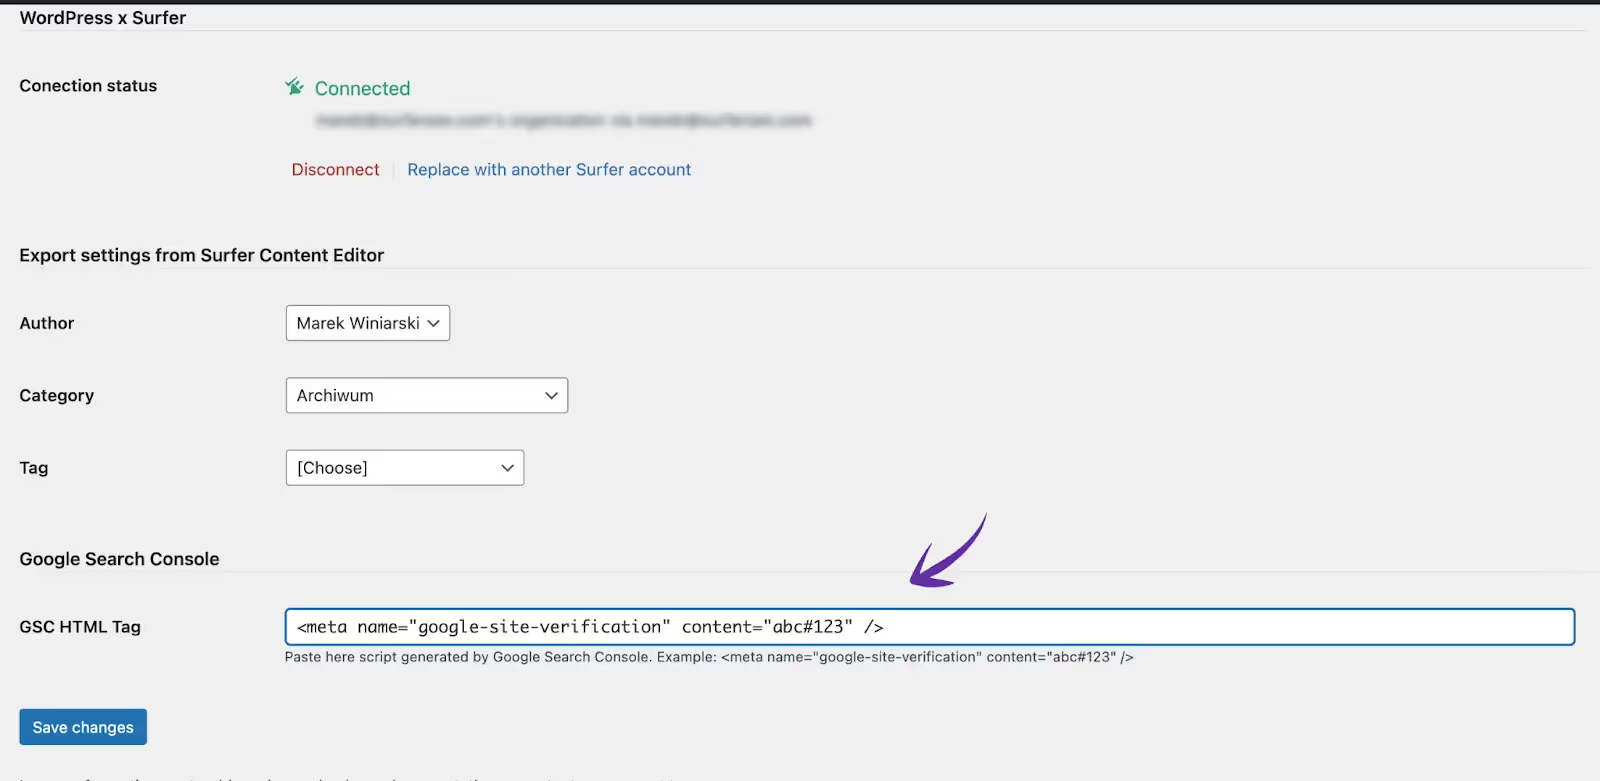
An easier way is to install a free Wordpress plugin like Surfer in your admin dashboard. Head to the SurferSEO tab in the left panel.
Paste the meta tag into the field for the Google Search Console HTML Tag. And save your changes.

Head back to Search Console and click Verify.
How to add Google Search Console to Shopify
You can use the URL prefix option when setting up Search Console for your Shopify store. But instead of adding a URL path, enter your website URL by copy-pasting it from the address bar in your browser. This way, you'll be sure to enter the correct domain even if you have multiple versions like a www or non www.
Sign into your Google Search Console account and select the URL prefix panel on the right.
When you're prompted to verify ownership of your website, select the HTML tag option. Copy the meta tag provided and head to your Shopify store.
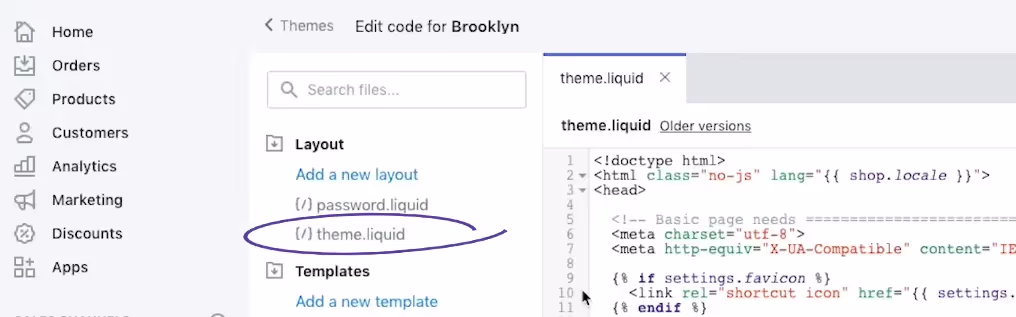
Navigate to Online Store > Themes, then select Edit Code under the Actions menu.
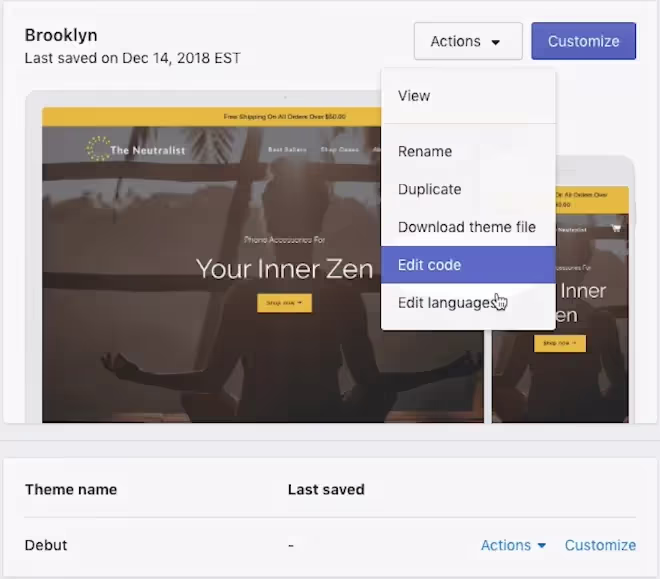
Select theme.liquid in the Layout folder. It should be in the top left.
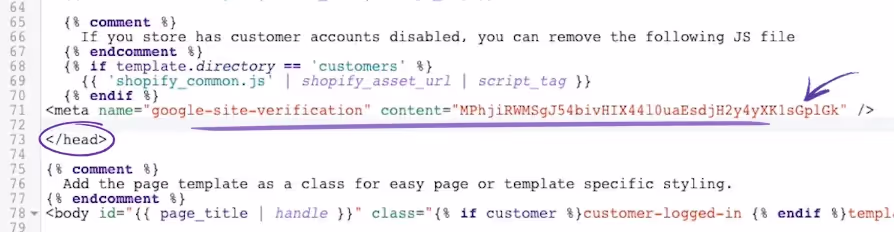
In the code editor on the right, look for the closing head tag </head> , and paste the HTML tag you copied from Search Console above it.
Click Save and then Verify on Google Search Console.
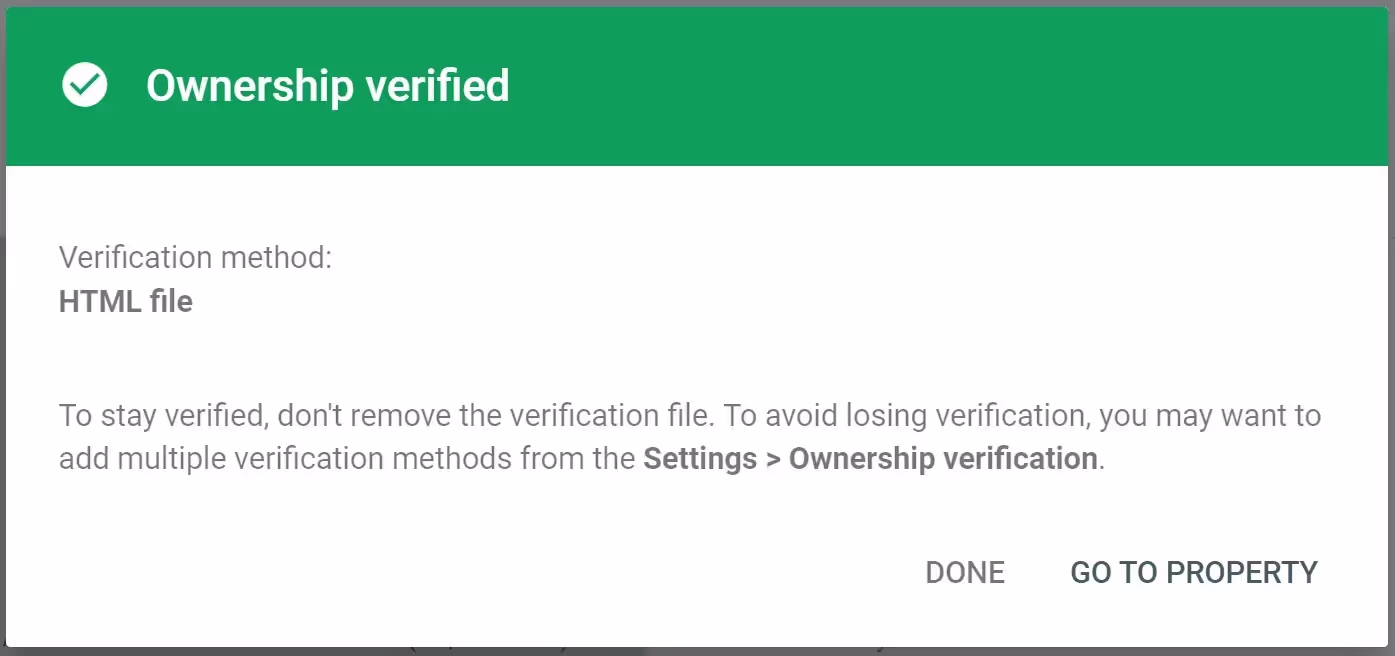
So there, we've discussed several methods to install Google Search Console for your website and begin monitoring your performance in Google search results. Once you've added Search Console correctly, you should see a verified box that looks like this.
Learn how to use Google Search Console for keyword research and to improve your website's SEO here.
How to submit a sitemap to Google Search Console
It's a good idea to submit an XML sitemap to GSC after you've verified your domain property. This will ensure that Google crawls your website to show up in search results.
What is an XML sitemap?
An XML Sitemap is a file that tells Google (and other search engines) about the pages on your website. It helps Google index your site so that people can find it when they search for keywords related to your business.
This is the equivalent of instructing Google on your website architecture and which pages you deem essential to show up in Google's search results.
How to create an XML sitemap for your website?
You can create a sitemap for your website in several ways, from using plugins and online tools to asking your developer to make one. Here are the most common methods.
1. Create a sitemap on WordPress
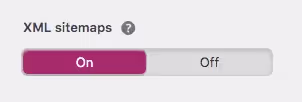
You'll need a free plugin like Yoast SEO or All in One SEO to create a sitemap for a WordPress website. First, head to your admin dashboard to install and activate the plugin. In the case of Yoast, head to Yoast SEO > General > Features and toggle XML sitemaps to on.
You should now be able to access your domain's sitemap on "yourdomain.com/sitemap.xml" or "yourdomain.com/sitemap_index.xml."
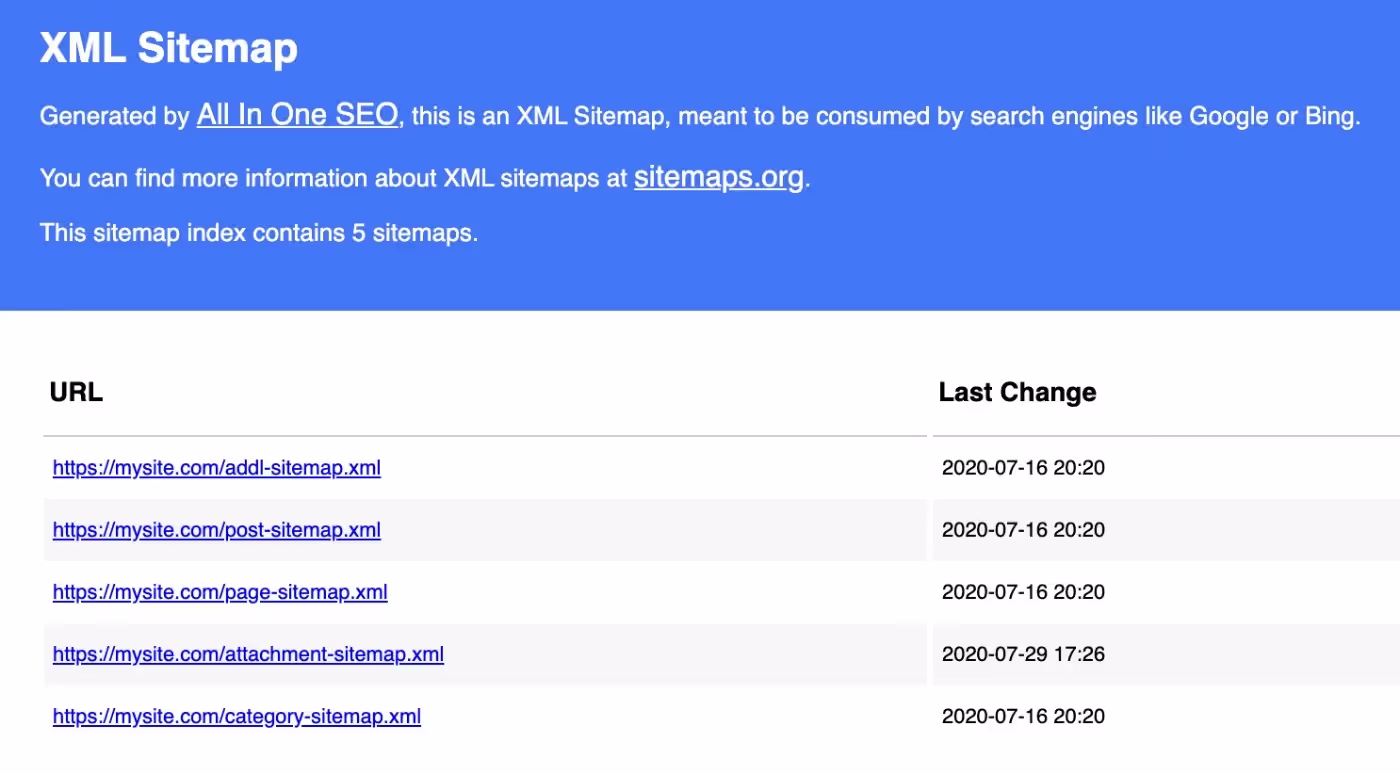
If you're using All in One SEO, the plugin automatically generates a sitemap. You can find it on your WordPress admin by going to All in One SEO > Sitemaps. The link to your sitemap will show up if you click on Open Sitemap.
2. Create a sitemap on Wix/Squarespace/Shopify
Content management systems like Wix, Squarespace and Shopify will automatically create sitemaps for your website.
You can find your sitemap at "yourwixsite.com/sitemap.xml" if you use any such CMS.
You can also use Screaming Frog or free online tools to generate a sitemap for your website.
Submitting an XML sitemap to Google Search Console
To submit your sitemap to Google, head to Google Search Console > Sitemaps and enter the URL you just generated in the previous steps.

Click Submit.
Congratulations, your website will soon be crawled and indexed to show up in the SERPs, and you can start ranking!
Google Search Console common metrics and dimensions
It's helpful to understand a few standard terms you'll encounter while using GSC. They'll help you get acquainted quickly to make the most of the tool.
What are Impressions in Google Search Console
Impressions in Google Search Console are the number of times your website appears for a specific search term in Google search results. You can see your impressions for each query in the Search Results section of Google Search Console. Impressions differ from clicks, another metric found in Google Search Console.
What are Clicks in Google Search Console
Clicks are the number of times someone clicked on your website in the search results, while impressions are the number of times your website appeared in the search results. If you have a lot of impressions but few clicks, it means that people are seeing your website in the search results but not clicking on it. This could be because your website needs to be more relevant to their query, or your meta description and title need to be optimized for CTR.
What is CTR in Google Search Console
CTR stands for click-through rate and is a metric used to measure the number of times people click on your web page after seeing it in the search results. A few factors can influence your CTR, such as the position of your website in the search results and the relevance of your website to the user's query.
What are Queries in Google Search Console
Queries are the top keywords that people are using as search terms to find pages on your website. Impressions signal the number of times your pages show up for a particular query, while Clicks are the number of times your page is clicked on for that specific query.
You can use this information to improve your website's ranking for certain keywords and better understand how people find your site.
What is Average Position in Google Search Console
Average position in Google Search Console is a metric that tells you where your website ranks on average in Google search results. This metric is important because it can help you understand how visible your website is in search and also help you identify any potential issues with your website's ranking. The average position is calculated by taking the average of all the positions your website appears in for a particular query.
What is Search Appearance in Google Search Console
Search Appearance in Google Search Console helps you track and improve how your website appears in Google search results. This includes the display of rich results and the user experience. You will find Search Appearance in the Performance > Search results tab and can use it to troubleshoot issues with your website's appearance in search results.

Conclusion
Google Search Console can be a powerful asset to your search engine ranking efforts and must not be ignored. Unlike third-party tools, the data in GSC is directly from your website and is Google's way of communicating how it sees your website. Therefore, you need to get familiar with GSC and start using it for SEO and keyword research to help you improve your rankings.